Multi-pole Busbar Installation Example
DARUI Electric recommends
1. Install flat steel brackets; fix the flat steel brackets on the crane beam or rail base plate by bolts or welding at a standard spacing of 1.2m (tighten with pressure plate bolts or weld on the rail beam). Ensure the brackets are straight along the entire line, the bracket protrusion is consistent, and the brackets are parallel without tilting. Generally, the center distance between the tubular busbar and the rail center should be 300mm.
2. Install hanging clamps; slide the hanging clamps onto the busbar at intervals, rotate the fixing nuts, but do not tighten them too much at this time. After positioning and leveling, tighten them.
3. Install the busbar; install the busbar with hanging clamps onto the flat steel brackets, tighten the nuts, and connect adjacent busbars with connecting bolts. The joints should be smooth, without steps, and the gap should be less than 0.5mm. Install joint protective sleeves, then install all busbars in sequence. Adjust the hanging clamp bolts so that the relative position of each busbar to the crane track is flat, level, and vertical with an error of no more than 10mm. Tighten the fastening bolts to ensure smooth operation of the current collector.
4. Install the inlet box; install the inlet box at the pre-designed power transmission position, make sure to tighten it, and then install the protective cover.
5. Install fixing clamps; install fixing clamps according to the design scheme.
6. Install end caps; install end caps at both ends of the busbar, or at the end of the entire busbar where no power is fed in. They can be installed before hanging.
7. Inspection; after the entire busbar is installed, carefully check whether the busbar is straight, the spacing is consistent, the hanging clamps are tightened, and the joints are smooth.
8. Install the current collector; push the current collector into the busbar and check whether the contact between the current collector and the conductor is good and whether the operation is smooth. If not, adjust it. Insert the fork into the waist of the current collector and weld the fork firmly to the appropriate part of the crane.
9. Connect the cable of the current collector to the cable of the electrical equipment; note that before wiring, check the insulation of the motor according to routine procedures. If any abnormality is found, repair or replace it.
10. Connect the power supply; there are two ways to supply power to the tubular multi-pole safety busbar. For middle power feeding, first assemble the conductor connecting parts and tighten the bolts. Then tighten the terminal blocks of the corresponding power supply model. For end power feeding, assemble the power terminal blocks onto the conductor at the end of the busbar, and then install the inlet box.
11. Power-on test; first recheck the busbar parameters such as voltage and current. Only when they are confirmed correct, can the power be turned on. Conduct a no-load test, run back and forth several times. If no abnormality occurs, proceed to the load test. Observe whether the voltage and current are normal. If any abnormality occurs, stop immediately, cut off the power, inspect, and after troubleshooting, resume operation.
Multi-pole Busbar Installation Example
I. Product Introduction of Tubular Busbar
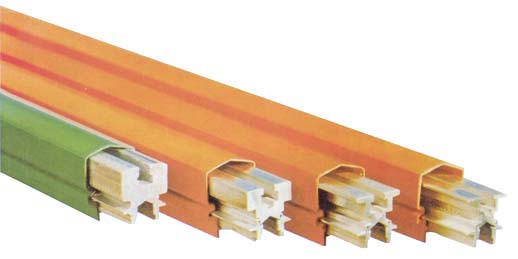
The QYG(J) series multi-pole tubular busbar is composed of a high-strength engineering plastic insulating conduit shell, multi-level conductive copper bars, current collectors, and suspension and fixing components. Due to its compact design, stable performance, and safe use, this product is widely used in small cranes with low current and high frequency, electric hoists, logistics automation assembly lines, and testing lines.
II. Composition of Tubular Busbar Products
Note: The above information and technical parameters are compiled and released by Yangzhou DARUI Electric Co., Ltd.